First Application
This tutorial demonstrates how to develop a simple application for image processing using Marvin. The first step is to download a version of Marvin framework, you can find the latest version here. Inside this .zip file there is a "marvin" folder which must be placed in the root folder of your application, like shown in Figure 1.

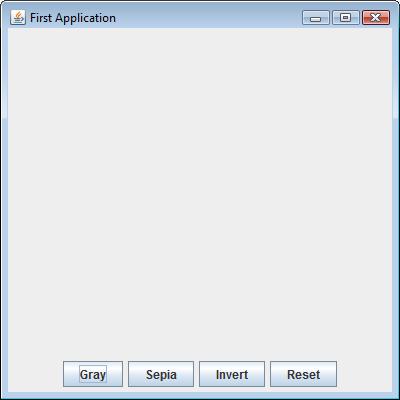
Figure 1. Screenshot of the application skeleton shown the Code 1.
Inside this folder there are other two folders, one containing the the framework and the other one containing the plug-ins. This separation allows the addition of new plug-ins without any change in the project since all plug-ins are loaded via reflection. In order to compile and run the application, is needed the addition of the framework jar (inside the folder marvin/framework) in the classpath. In the case of using command line, simply add the tag "-classpath ./marvin/framework/marvin_1.3_rc2.jar" (for the version 1.3 release 2) in the compilation and running. In the case of using an IDE, it is necessary to add the framework jar into the libraries list (Eclipse: Project/Properties/Java Build Path/Libraries).
Now the development environment is ready to be used and then the application skeleton is created, as presented in Code 1
import java.awt.BorderLayout;
import java.awt.Container;
import java.awt.event.ActionEvent;
import java.awt.event.ActionListener;

import javax.swing.JButton;
import javax.swing.JFrame;
import javax.swing.JPanel;

public class FirstApplication extends JFrame implements ActionListener
{
    private JPanel		panelBottom;


    private JButton             buttonGray,
                                buttonEdgeDetector,
                                buttonInvert,
                                buttonReset;

    public FirstApplication()
    {
        super("First Application");

        // Create Graphical Interface
        buttonGray = new JButton("Gray");
        buttonGray.addActionListener(this);
        buttonEdgeDetector = new JButton("EdgeDetector");
        buttonEdgeDetector.addActionListener(this);
        buttonInvert = new JButton("Invert");
        buttonInvert.addActionListener(this);
        buttonReset = new JButton("Reset");
        buttonReset.addActionListener(this);

        panelBottom = new JPanel();
        panelBottom.add(buttonGray);
        panelBottom.add(buttonEdgeDetector);
        panelBottom.add(buttonInvert);
        panelBottom.add(buttonReset);


        Container l_c = getContentPane();
        l_c.setLayout(new BorderLayout());
        l_c.add(panelBottom, BorderLayout.SOUTH);

        setSize(340,430);
        setVisible(true);
    }

    public static void main(String args[]){
        FirstApplication t = new FirstApplication();
        t.setDefaultCloseOperation(JFrame.EXIT_ON_CLOSE);
    }

    public void actionPerformed(ActionEvent e){
        if(e.getSource() == buttonGray){
        }
        else if(e.getSource() == buttonEdgeDetector){
        }
        else if(e.getSource() == buttonInvert){
        }
    }
}
The result of Code 1 is shown in Figure 2.

Figure 1. Screenshot of the application skeleton shown in the Code 1.
The next step is loading and displaying the image. First, add the imports shown below.
import marvin.gui.MarvinImagePanel;
import marvin.image.MarvinImage;
import marvin.io.MarvinImageIO;
Next, declare MarvinImage objects to represent the image and a MarvinImagePanel to display it. Insert the following code after the class declararion.
private MarvinImagePanel	imagePanel;
private MarvinImage		image,
				backupImage;
    public FirstApplication()
    {
        super("First Application");

        // Create Graphical Interface
        buttonGray = new JButton("Gray");
        buttonGray.addActionListener(this);
        buttonEdgeDetector = new JButton("EdgeDetector");
        buttonEdgeDetector.addActionListener(this);
	buttonInvert = new JButton("Invert");
	buttonInvert.addActionListener(this);
        buttonReset = new JButton("Reset");
        buttonReset.addActionListener(this);

        panelBottom = new JPanel();
        panelBottom.add(buttonGray);
        panelBottom.add(buttonEdgeDetector);
        panelBottom.add(buttonInvert);
        panelBottom.add(buttonReset);

        // ImagePanel
        imagePanel = new MarvinImagePanel();


        Container l_c = getContentPane();
        l_c.setLayout(new BorderLayout());
        l_c.add(panelBottom, BorderLayout.SOUTH);
        l_c.add(imagePanel, BorderLayout.NORTH);

        // Load image

	image = MarvinImageIO.loadImage("./res/test.jpg");
        backupImage = image.clone();
        imagePanel.setImage(image);


        setSize(340,430);
        setVisible(true);
    }
Running the application you should get the result shown in Figure 3.

Figure 3. Loading an image and siaplying using the MarvinImagePanel.
In order to load and apply a plug-in when the buttons are clicked, first import the following classes.
import marvin.image.MarvinImageMask;
import marvin.plugin.MarvinImagePlugin;
import marvin.util.MarvinPluginLoader;
Next, declares a MarvinPlugin object.
private MarvinImagePlugin imagePlugin;
Finally, add the modifications presented in red to the method actionPerformed(), shown in Code 4.
    public void actionPerformed(ActionEvent e){
        image = backupImage.clone();
        if(e.getSource() == buttonGray){
            imagePlugin = MarvinPluginLoader.loadImagePlugin("org.marvinproject.image.color.grayScale.jar");
            imagePlugin.process(image, image);

        }
        else if(e.getSource() == buttonEdgeDetector){
            imagePlugin = MarvinPluginLoader.loadImagePlugin("org.marvinproject.image.edge.edgeDetector.jar");
            imagePlugin.process(image, image);

        }
        else if(e.getSource() == buttonInvert){
            imagePlugin = MarvinPluginLoader.loadImagePlugin("org.marvinproject.image.color.invert.jar");
            imagePlugin.process(image, image);

        }
        image.update();
        imagePanel.setImage(image);

    }
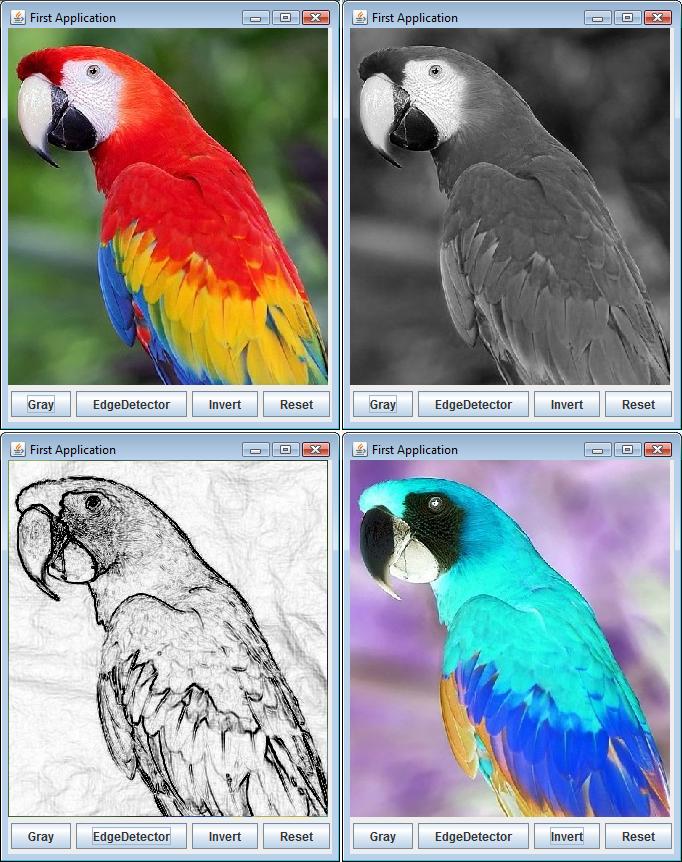
Well done. You can check the final source code here: FirstApplication.java. Finally, the Figure 4 presents the application of each plug-in to the image.

Figure 4. Screenshots of the result image for each plug-in.
For any kind of support: Marvin Discussion Group
| "Introduction" << Previous Article | Next Article >> "Multithreading" |